Sometimes, after game-updating or some unknown reasons, the emulator will show that can’t connect the network, here is a tutorial to solve the problem:
How to change the DNS settings (Windows 10)
- Open the Control Panel.
- Click Network and Internet.
- Click Network and Sharing Center.
- On the left pane, click Change adapter settings.
- Right-click the network interface connected to the internet, then click Properties. Choose Internet Protocol Version 4 (TCP/IPv4).
- Click Properties.
- Click Use the following DNS server addresses→Click Advanced→Enter the IP address in the DNS server fields.
- Click OK, then click Close.
For Windows 7/8, Click here.
Here are Free Google Public DNS IP addresses, you can choose to fill it.
The Google Public DNS IP addresses (IPv4) are as follows:
- 8.8.8.8
- 8.8.4.4
The Google Public DNS IPv6 addresses are as follows:
- 2001:4860:4860::8888
- 2001:4860:4860::8844
The detailed steps as follows:
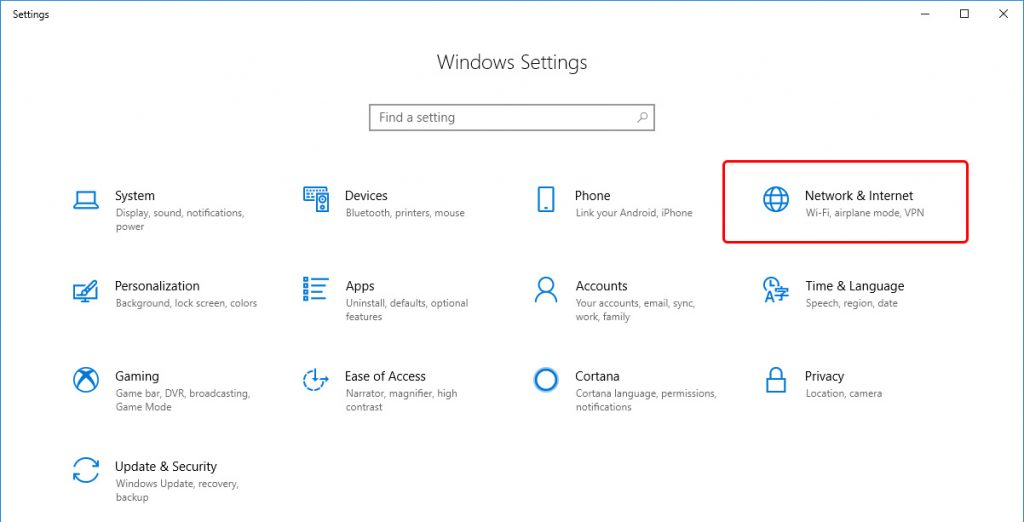
- Go to the Control Panel
- Click on Network and Internet
![Update DNS settings on Windows 10 - Step 2]()
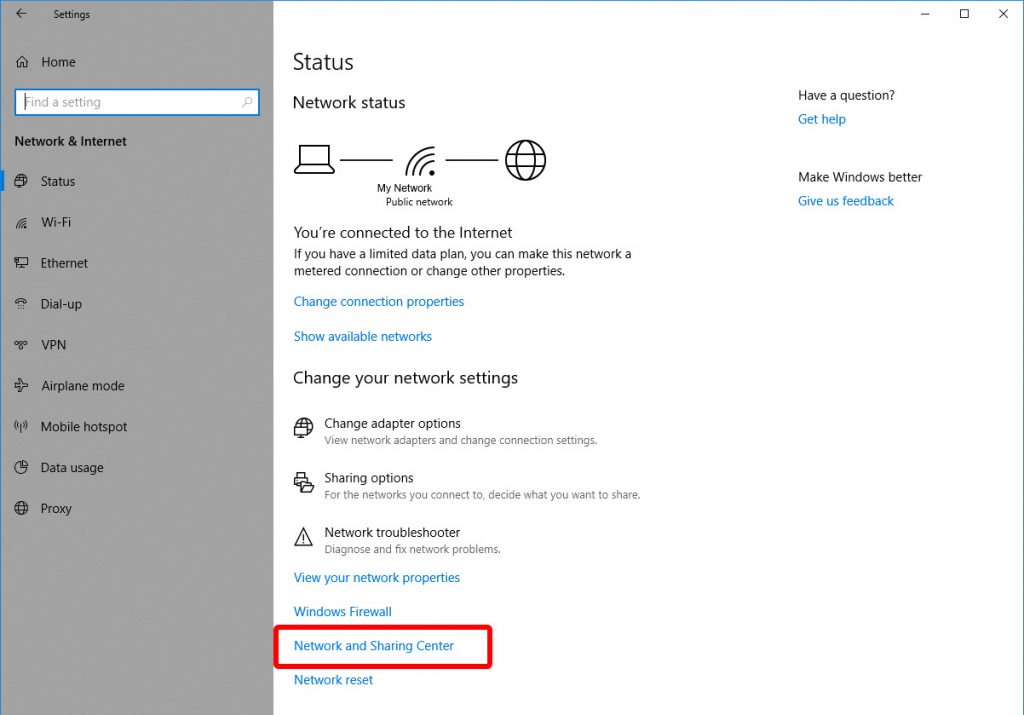
- Click on Network and Sharing Center
![Update DNS settings on Windows 10 - Step 3]()
- Go to Change Adapter Settings.
![Update DNS settings on Windows 10 - Step 4]()
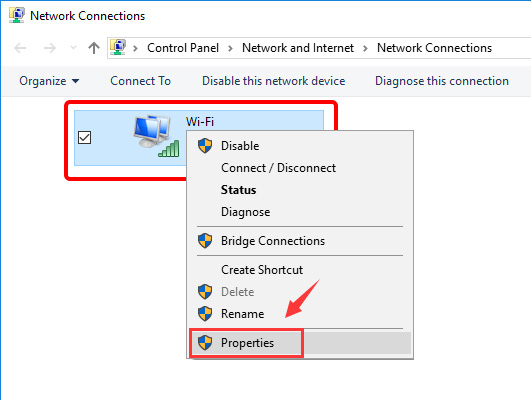
- You’ll see some network icons here. Select the network you’re currently connected to and right-click on it. Select Properties.
![Update DNS settings on Windows 10 - Step 5]()
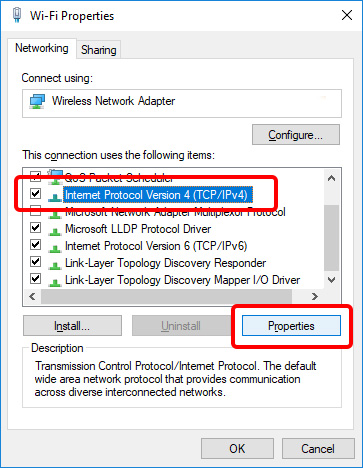
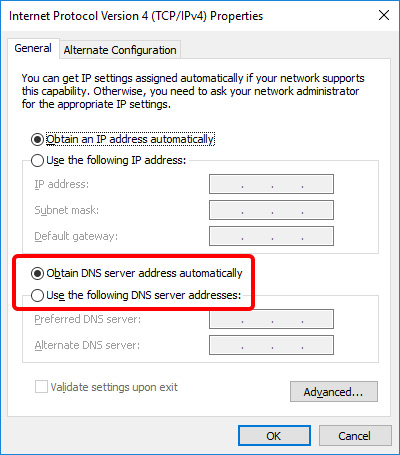
- Click on IPv4 and select Properties.
![Update DNS settings on Windows 10 - Step 6]()
- If “Obtain DNS server address automatically” is selected, click the radio button next to “Use the following DNS server addresses:”
![Update DNS settings on Windows 10 - Step 7]()
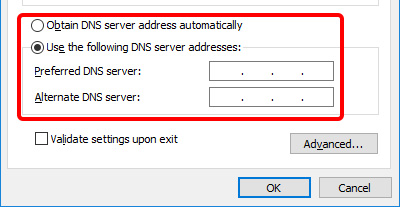
- Now enter the DNS addresses you want to use.
![]()
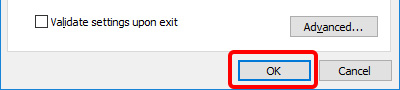
- Click on Ok and Close.
![Update DNS settings on Windows 10 - Step 9]()

Note: If the emulator shows no internet, please click here.